Mechanical Circulatory Support
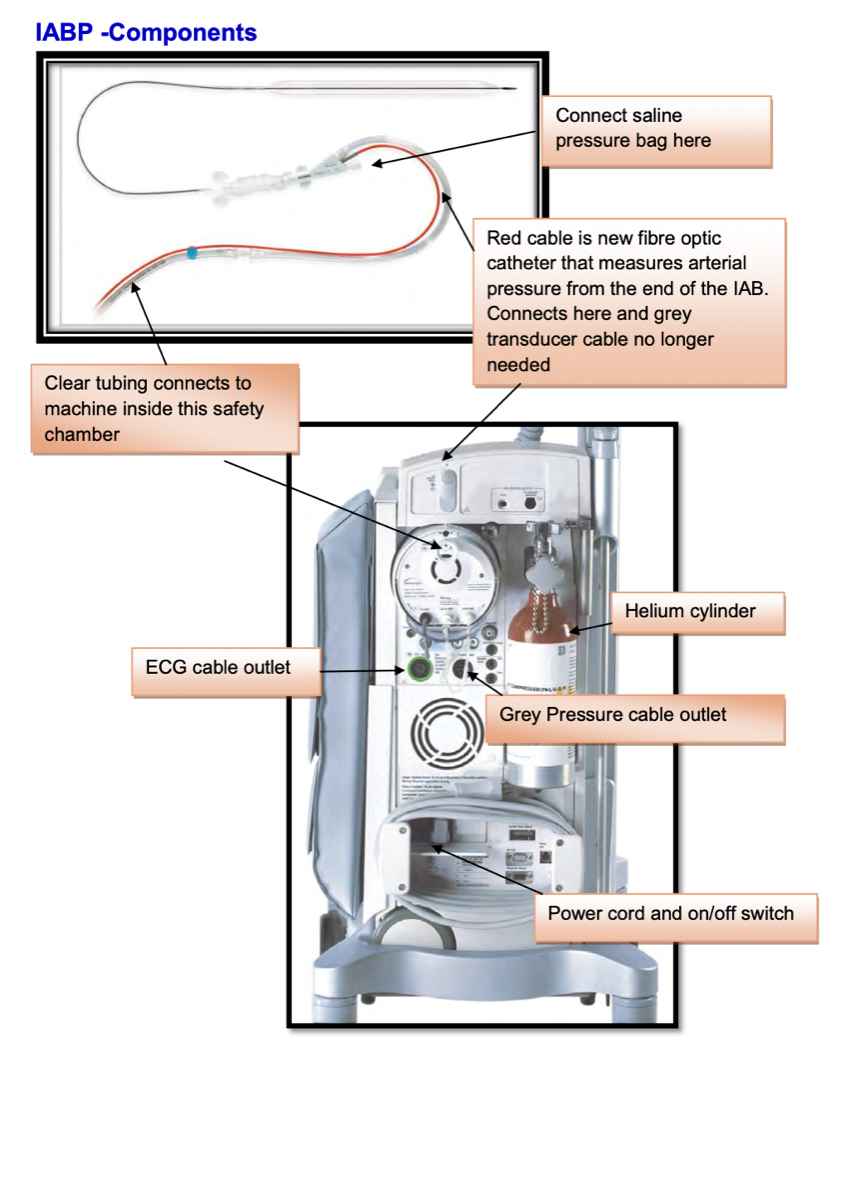
Intra-Aortic Balloon Pump
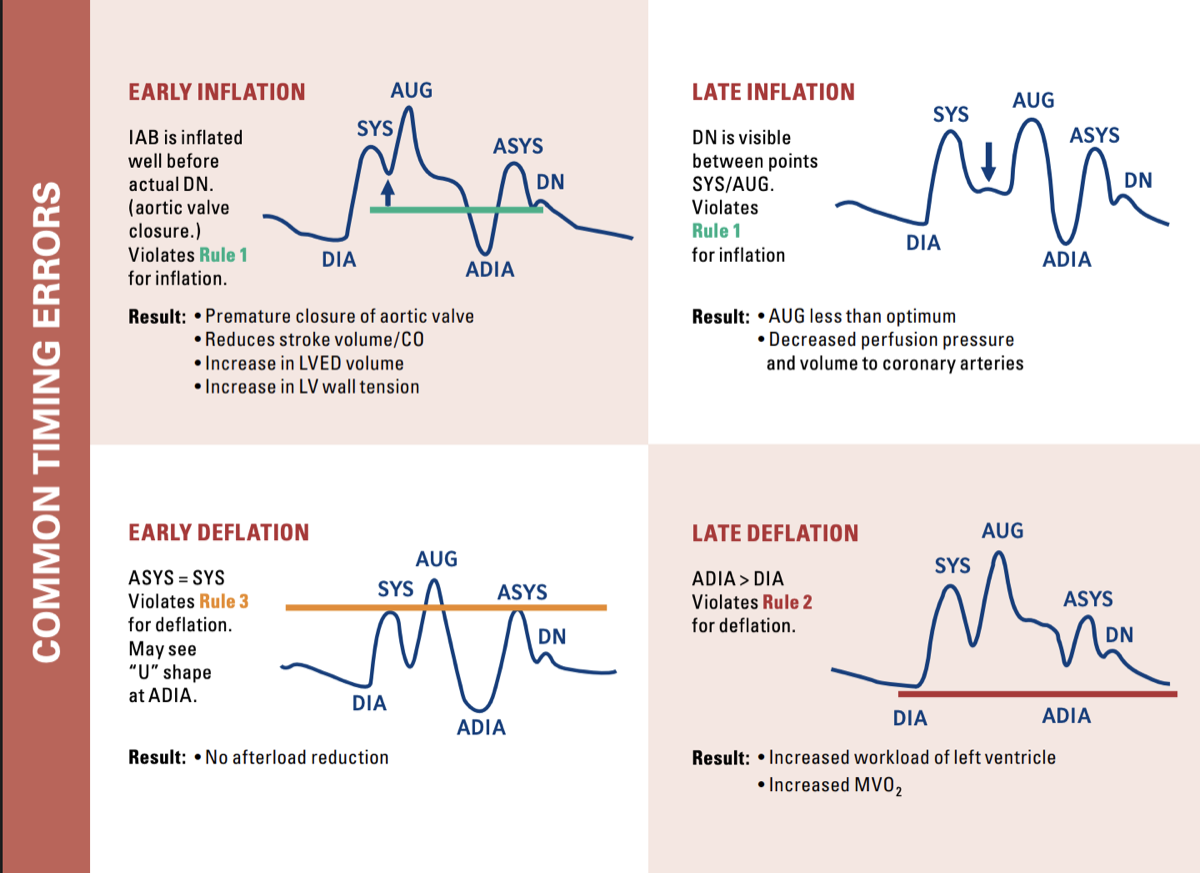
Counterpulsation device for LV support. Diastolic augmentation increases coronary perfusion while systolic deflation reduces afterload.
25-50mL
Balloon Volume
Helium
Inflation Gas
0.5-1.0
L/min CO Gain